DIY: Wedding Photo Booth

Below, Truly Engaged writer (and recent bride) Rachel shares her own experience with DIY photo booths.
-----------
Peanut butter and jelly. Photo booths and wedding receptions. Some things are just {destined} to go together! So naturally, when I was planning my wedding last year, I envisioned having a photo booth at my reception. The silly snapshots, the funky hats, the feather boas...I wanted it all!
However, I couldn't justify coughing up $500, $1000, or up to $1500 (gulp!) to hire a professional photo booth rental company. Plus, my wedding budget simply didn't have room for it. If I was going to have a photo booth, I would need to do it myself. After a little research and creativity, I was able to create my own DIY photo booth for under $400.
For today's post, I'm going to "pull back the curtain" and share how my husband and I were able to pull off our homemade photo booth. Perhaps it will inspire some of you to create your own, too!
FIVE STEPS TO PHOTO BOOTH: HOW I DIYed IT
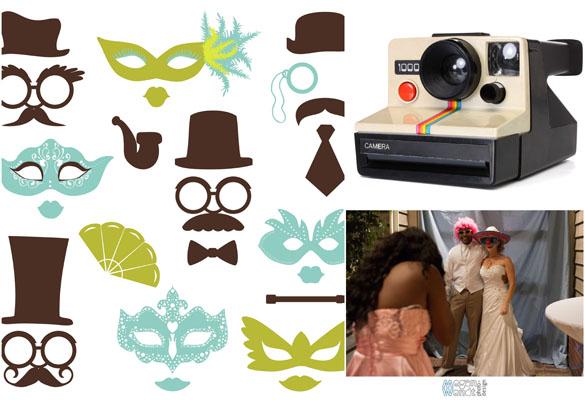
Step #1: Buy Camera + Film I adore the look and feel of those vintage Polaroid cameras, so I didn't want to use an iPhoto, Instagram, or really anything digital (though there are plenty of blogs out there that show you how to go the digital route, if you're interested in that). I found old Polaroid cameras online, but hunting down the proper film for them was difficult, and the film itself was pretty expensive.
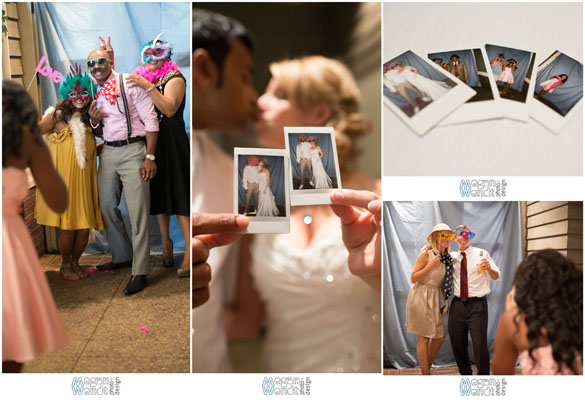
After shopping around online, I discovered a Fujifilm Instax mini 7S at Walmart that cost a very reasonable $70. It had very good reviews online, too. Success! For film, I found some Instax Twin Packs on Amazon. We bought enough Twin Packs to have each of our 90 guests take two pictures: one to keep, and one for our guestbook.
{Fun Guestbook Idea}
Instead of a book, we used a mailbox. We also made personalized note cards that guests could write on, then seal in an envelope with their photo booth snapshot.
Step #2: Find Props I learned that the most affordable way to obtain photo booth props was to follow the three Rs: reduce, reuse, recycle! My friend had stocked up on photo booth props for her own wedding reception a few months back, so she graciously lent us her mustache lips, clown wigs, and other goodies to use at our own reception.
I also found some other affordable ways to get DIY photo booth props:
- Thrift stores
- Halloween clearance sales
- Print-at-home templates {Download Free Printable Photo Booth Props}
Step #3: Scout Out Photo Booth Location
Since we didn't plan to build an "actual" booth, we visited our reception venue and looked for little "nooks" that could house the photo booth station. Luckily, there was a little U-shaped area near the restrooms that had french doors, flanked by two walls. Perfect!
Step #4: Create Backdrop We wanted to balance the kooky photo booth props with a simple, solid-colored backdrop. Since the french doors already had a built-in curtain rod, we were able to drape a bed sheet over it and voila! Instant backdrop.
Step #5: Enlist Helpers We had a few of our teenage cousins, nieces, and nephews help manage the photo booth area during the reception. They worked in pairs, and took turns in shifts so that they could also enjoying visiting, eating, and bustin' a move on the dance floor.
And you know what? They had a blast! They loved snapping pics and helping the guests find silly ensembles for the photos. They even swooned over the camera itself (I'm guessing because it reminds them of Instagram).
-----------
There are many ways to make a DIY photo booth for a wedding reception, but hopefully my method offers some inspiration for future brides and grooms. (For more ideas, check out Doug and Emily's super fun DIY photo booth.)
What about you: Did you go the DIY route for your wedding photo booth? Do you have any tips/advice for other couples on how to pull it off? Share your thoughts!
 Wedding photos courtesy of Megan Wendt Photo + Design.


